User:Moony77Wolfy/SandboxPlaceEditing
Uh, hi there![edit]
Right now using this to clear up the Highpoint Tower page a bit.
Walkthrough[edit]
Exterior[edit]
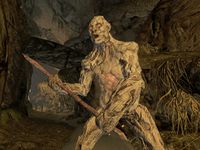
Numerous scathecraw and trama root plants are located in the tower's vicinity. To the southwest of the tower is a heart stone deposit. At the top of the tower is a chest, accessible either through a gap in the base of the tower walls, or by climbing counter-clockwise around the tower until the highest reachable point, then reversing and jumping onto a lip of the tower. The entrance to Highpoint Tower is via a tunnel at the northern end of the structure, guarded by two leveled ash spawn. It's easy to miss; if you're climbing on the rocks and discover the tower's map location without seeing the entrance, you may be directly on top of the tunnel, so look down. The entrance to the tower interior, at the end of the corridor, is blocked by ash until you have started Old Friends.
Highpoint Tower[edit]
You will enter into a circular room, containing a downwards spiral staircase and a steel dagger, a pair of iron gauntlets, three pieces of firewood, a woodcutter's axe and three barrels. The room to the , opposite the entrance, has caved in, and among the wreckage are two barrels, four bottles of Nord mead and two fly amanita fungi.
Traveling down one flight of the spiral stairs will bring you to a landing. On this level there is a deer pelt, a bottle of wine, four potatoes, a carrot, two pieces of firewood, three goblets and a bowl. Among the rubble at the rear is an open chest containing three coin purses (one small, one medium and one large), and an empty common soul gem.
On the next landing is a long wooden table and a chair against the east wall. On top of the table is a random potion of stamina, another random potion, and Ildari's Journal, vol. I, in which she expresses her contempt for her saviors and promises to exact revenge on her former master, Neloth.
At the bottom of the next staircase, to the right, is a long wooden table. On top of the table are two steel ingots, two sacks and a barrel, and underneath sits another sack, a barrel and an open crate. To the left is a fish barrel and a cow hide, and against the west wall is a broken archery target with two steel arrows in it and a quiver of steel arrows beside it. The path then leads southwest down a corridor lit by candles attached to the walls.
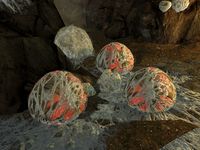
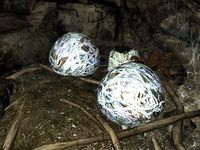
Ahead, the corridor opens into a cave with spider eggs around the perimeter, three of which are traps, which will burst open and release a flame spider if you are detected. The egg traps can be triggered from a distance with a damaging spell or missile. There is a tunnel to the southwest, from which two flame cloaked spiders will emerge, followed by two albino spiders. Up a short set of steps to the right is a spellcaster trap that will fire at the spiders as well as you.
Inside the cave, there is a pair of iron gauntlets on the ground to the right and a steel sword in the center. From the cave you will find one tunnel heading to the south and another heading past the spellcaster trap to the north-northwest. There is also an albino spider egg that can be harvested for a damaged albino spider pod. Following the tunnel to the south, you will find another albino spider egg and two ruby geodes. The tunnel continues to the northwest, and joins up with the second tunnel from the cave. There is another albino spider wandering in this area and ahead, to the northwest, the tunnel is blocked with spider webs that can be cleared away with weapons or spells. In the second tunnel, there is a bottle of ale, an albino spider egg and a pair of boots.
Through this you can see a frost cloaked spider moving around. Past the webbing you enter another cave, this one with a central pillar with the cave around it descending to a lower level in front of you. Down this lower level you can see two spider eggs glowing blue and moving these will produce jumping frost spiders. Against the pillar are two sapphire geodes. To the left near an albino spider egg is a set of small antlers on the ground and further around is an imp stool in front of an emerald geode. There is an earthen ramp leading down to where the blue glowing spider eggs were. There is an albino spider egg, a pair of iron boots and a set of iron armor. There is a ramp leading back up to where you entered this cave from. Near the top of the ramp is a small coin purse, a steel dagger, and a pair of iron gauntlets. On your left when coming back up is an imp stool fungus and an amethyst geode.
Back in the first cave, following the corridor past the spellcaster trap, this corridor has been badly damaged and partially caved-in. On your left are two sacks, a barrel and several crates, with another sack and fish barrel sticking through the ceiling from the floor above. An ash spawn patrols along this corridor. Just before you get to a lit doorway on your left you will be able to see another spellcaster trap further along the corridor to the north. By the doorway is a small table with a lit lantern on top. In the center of the room is wooden scaffolding with a sack underneath and a chair beside it, that is supporting the ceiling. There is an ash spawn in the room to your left. On your left as you enter is a chair, past this is a naturally lit area below a hole to the outside above, on a rock is a bird nest containing a pine thrush egg. Further around the wall, to the right is an open chest containing a plate, a goblet and an unlocked strongbox with another goblet beside the chest. At the rear of this room two more ash spawn will rise from the ground and attack. To the right of the entrance is a set of shelves containing two leather strips, a drum and a deer pelt, with a sack and four iron ingots in front and an anvil that's knocked over and unusable to the left.
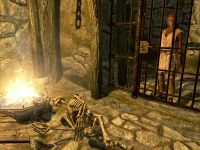
Back in the corridor there is a barrel on your left and don't forget to retrieve the soul gem from the second spellcaster trap as you pass. After this the corridor bears to the east; on your right is a bottle of wine on the floor. At the end it descends a few stairs before a doorway with crates on either side; the one on the left has four pieces of firewood on top and the one on the right has a sack on top. Through the doorway is a circular room, just inside the room is a tripwire trap that activates a falling boulders trap, but with room to walk around it and in the center is an elemental rune trap. Above the room is a wooden bridge spanning the room from southwest to northeast, with a skeleton in a cage hanging from it. On your left is a torture rack and beside this is an arcane enchanter. On the enchanter are three empty soul gems, one petty, one lesser and one common. Under the enchanter is a basket containing a pair of leather boots. There is a corridor to the east. To the right of this is a wooden block covered in blood with a woodcutter's axe and another rack beside it and to the right of this is a kettle full of hot coals with a heated bar beside it.
Following the corridor to the east you pass a barrel and an open crate containing a pickaxe on your right, then on your left are several crates with two sacks and a cow hide. In front of you is a elemental rune trap on a wall. By the trap is a junction with the corridor running north-south, to the south there appears to be cells and to the north is a lit brazier on the ground and the path turns to the east.
Turning south on your right is a crate with a salt pile, a charred skeever hide and a random book on top and a sample of wheat beside it. Through the doorway into the area with cells, in the center is a round wooden table and chair. On the table is Ildari's Journal, vol. II. This shows her growing paranoia with regards the miners and her plans to seize control and start experimenting on them. There are three cells, in the first two are just human bones, but in the third is a prisoner named Niyya, if you release her she will give you a bit more history of what has happened here with Ildari, she will also ask that you don't kill her too quickly. Between her cell and the table is a skeleton that can be looted for a few coins. She will then start running to leave the tower. If you didn't activate the tripwire trap, she will as she leaves, but it will not harm her as she is going the other way; however if you did activate the trap, she might trip over a boulder and die.
Following the corridor north, by the brazier are two bowls, a candlestick, a steel war axe and a medium coin purse and behind some fallen masonry is a Namira's rot fungus and a set of fine clothes. Also above is an open crate containing two coin purses and a flawless diamond (see notes.) The wall has been broken through, heading east and you enter a tunnel and after a few paces the floor turns to wooden planking and descends a ramp, ahead on this level is an orichalcum ore vein on the east wall and a second further along on the western wall. They are past a crate with a leg of goat and bottle of Nord mead on top and an open crate containing a second bottle beside the crate. Returning to the ramps descending further and the path turns to the north and enters a large cave with wooden scaffolding and ramps around the cave.
You pass a broken cart containing a knapsack on your left. There is an opening to the northwest and rock pillar in the center surrounded by scaffolding and ramps. In the eastern corner on ground level is another orichalcum ore vein. To the left of this is a wooden ramp leading up, under this is another broken cart containing two pieces of firewood and a woodcutter's axe. Climbing the ramps around the pillar, there is a small table in the northern corner and at the top on the pillar is a sapphire geode. Back at the bottom there is a gold ore vein beside the scaffolding and a sapphire geode against the wall to the west.
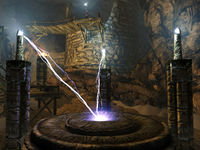
Through the opening to the northwest you can see two damaged towers and a raised area in front of them with three pillars with white lights at the top. There is wooden scaffolding up to and between the towers. As you enter this area Ildari will appear at the top of the rear tower and start a speech ridiculing Neloth for sending a low-life to finish her off. Then the white topped pillar will spark to life and an ash guardian will appear in the middle. There are five ash spawn in addition to deal with and can be quite a challenging fight. Once they have been dealt with examining the cave you should find a deer pelt, a blue mountain flower. There is an earthen ramp behind the ash guardian, at the top if you bear to the right there is a archway into a cave full of fungi, if you turn right before the arch and jump up onto a ledge and follow the cave wall along you will find a Namira's rot fungus. In the cave through the arch are three imp stools, four white caps, a fly amanita, two blisterworts and two Namira's rot fungi growing and a bleeding crown and imp stool fungus sample on a crate. There are also two pairs of boots, a pair of iron boots, a flower basket, an open crate containing various hats including a fine hat and a wedding wreath, a gold jeweled necklace, a silver emerald necklace and a medium coin purse. Behind this is a cart containing two goat cheese wheels, two loaves of bread, a red apple, two bottles of alto wine, a bottle of wine.
To the left of the arch is a pile of rubble that you can jump up to reach the to of the wall and on top of the arch. There is an open crate on your left containing a sample of lavender, a black soul gem and a copy of Souls, Black and White. On your right is an empty cart, a pile of firewood a wood chopping block, a woodcutter's axe, and a potion.
Back in the main area you should find up to three rock warbler eggs. At the top of the first ramp, under the second ramp is a set of small antlers and a thistle branch with an open chest containing a leveled invisibility potion, a bowl of spriggan sap and two bowls of bone meal-(some of these you may find difficult to reach/see however you can walk to the other side of the ramp for a better angle or the use of telekinesis helps too). Just after is a fish barrel on your left and at the rear of the first tower are two more barrels, an open chest partially buried in the ash, a crate with an apothecary's satchel and a random book on top and a basket with a pair of leather boots.
Continue to the top of the tower and cross over to the second tower, descending inside. On your left are a series of sets of shelves, the first contains a snow fox pelt, a beehive husk, a torchbug thorax, a sample of frost mirriam, three soul gem fragments, two garlic bulbs, an empty petty soul gem and a bowl containing a sample of snowberries. The second contains a sample of tundra cotton, three leveled potions, one of healing, one of magicka and one of stamina, a cup, a loaf of bread, an eidar cheese wheel and a bowl of glow dust. The third set contains a flawless sapphire, a ruby, a blue mountain flower, a red apple, two bowls of fire salts, two empty common soul gem, a soul fragment, an empty petty, two blue mountain flowers in a wooden bowl, two chaurus eggs, a loaf of bread, a copy of Ahzidal's Descent. On a narrow table against another ramp is a bowl containing a bottle of alto wine, and a random book. Under this table is a goat hide. to the right, under the ramp is a barrel, and fish barrel with a loaf of bread and an eidar cheese wedge on top with a wolf pelt beside it on a crate and in a basket is a gourd. To the right of the ramp you descended is an alchemy lab with two bowls of bone meal on top. to the left is a bowl containing a giant's toe and to the right is a bowl containing two hawk feathers and a hawk beak. To the left of the alchemy lab is a round wooden table with an unlocked strongbox and Ildari's Journal, vol. III on top.
There is a ramp leading back down to the southwest again. At the bottom are two sacks and a tunnel leading away to the southwest. The tunnel twists and turns a couple of times, when it turns to the southeast for the second time there is a split level tunnel in front of you, an ash spawn ahead at the end of the bottom level three more leveled ash spawn will rise and attack you from in front and behind you. Once they are all dealt with follow the right-hand side of the tunnel as it rises, jump up at the end to find a skeleton and a Skaal boots, coat and hat, turn to the west and jump up to another ledge to find the gloves and an unlocked strongbox. Once you've collected all this you can drop back down to the lower level and continue along the tunnel. At the end another hole has been open up in the wall of the fort, on your left is a bleeding crown fungus. Pass through the hole and turn left, at the bottom of some stairs is a cave-in. Among the rubble is an open chest containing two highly leveled poisons and an iron helmet, there is also an imp stool growing in side. There is also a barrel at the top of the stairs. Then following the corridor past a lit brazier on the right to the southwest. You cross over the previous circular room that had the tripwire by the entrance. Once over this the corridor narrows and then turns to the southeast, a few paces along there is a crate and sack on your left, on the crate is a leather strip. It turns to the right twice just after this and you come to a twin leveled room with Ildari on the top level opposite you.
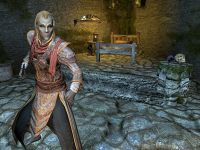
Exercise caution when dealing with Ildari, as there are two lightning traps protecting her. Ildari is armed with a staff of lightning bolts and is a powerful mage. Once her health is depleted, she kneels down, and cannot be damaged further. This is your opportunity to take her heart stone. You can either rip it out or pickpocket her to retrieve it. Once her heart stone is removed, she'll drop dead.
Under the overhang on the ground level is an arcane enchanter. To the left is an open crate containing a sample of elves ear, a bowl of fire salts, a sample of bone meal and an open chest containing a deer pelt. To the right of the enchanter is a sack and two barrels. A set of small antlers and a sample of juniper berries lies on top of one of the barrels. Nearby is an open crate containing a filled petty soul gem. A crate containing a random book, a barrel and a soul gem stand beside the pillar supporting the overhand. Atop the barrel is a bowl of bone meal and on the stand is an empty lesser soul gem. To the southwest is a doorway that leads to stairs up to the higher level. There is another wood chopping block in the northern corner with a woodcutter's axe and piece of loose firewood beside it.
Underneath where Ildari paces is another area with a pillar supporting the upper level. By this pillar are two barrels, four sacks and a couple of crates. Atop one of the barrels is a bowl containing frost salts. A leg of goat is on top of a crate. Against the southwest wall is a sideboard with two sacks, a cow hide and a leather strip on top. Three more sacks lie to the left. Against the rear wall, there are two crates with bleeding crown growing between them. A deer pelt is sitting atop one of the crates, and there is a kettle containing an iron helmet and iron boots in front of them. In the middle is a block of wood with an iron sword, a pair of boots, two pieces of firewood and an open crate containing a small coin purse and silver ring. A cage containing a skeleton which can be looted is hanging over this area.
At the top of the stairs you come out onto a balcony opposite where Ildari was/is pacing with a stone bridge connecting the two balconies. In the middle of the southeast wall is a large fire place, with a rack hanging from the ceiling to the right holding a rabbit and sample of frost mirriam. There is a chair, goblet and bottle of wine in front of the fire. To the left is an exit with raised spears blocking the path forward and another rack hanging from the ceiling holding two pheasants and a garlic braid. In the northern corner of the balcony is a crate with a deer pelt on top. To the right of the bridge is a mead barrel and goblet.
Crossing over the bridge, in the western corner is a boss leveled chest in front of you on a raised section with a square wooden table to the left of the chest. On the table is a bowl of glow dust, and a wooden plate containing a dragon's tongue flower. To the right of the chest is a set of shelves containing a fox pelt, a leveled healing potion, a leveled magicka potion, a bowl containing a garnet, diamond and emerald and a wooden bowl containing hawk feathers. There is a bowl and plate with an orange dartwing on top, at the front of the raised section. Against the northwest wall is a sack, crate and basket containing four wheat samples. In the northern corner is her bed with a small round wooden table and pair of boots to the left and a bottle of wine to the right. Under the bed is a plate containing an eidar cheese wedge and rabbit haunch. At the front of this raised area are two nightshades and a deathbell. To the left of the bridge is the lever that lowers the spears on the other balcony.
Past the now lowered spears there is a spiral stone staircase leading up. Part of the way up, on your right is an open chest containing a bowl and goblet, with a candlestick next to it. The staircase continues past this spiraling the opposite way. At the top there is a hidden door with a chain on the left. This opens back to the badly caved-in room right by the entrance.
Notes[edit]
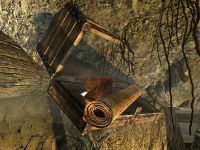
- Just north of the prison, where the hallway turns east, there is a chest embedded upside down in the ceiling. On the inside of the lid, behind a rolled up rug, there are two coin purses and a flawless diamond. Because of the angle, it can be difficult to get at the items, even with Telekinesis, but Telekinesis will work if you're facing at just the right spot as you approach from the other end of the hall. It may be easier to use an explosive spell to scatter them.
- There are only 2 Wedding Wreaths found in the game.
- When facing incoming melee attacks, one of the ash spawn in the very last group will very likely try to run away as fast as he can, all the way to where Ildari stays and past her. If the two lightning traps next to Ildari have not been disabled, the explosions caused by this ash spawn will dislodge the soul gems on the traps, thereby disabling both of them and thus trivializing the final battle.
Bugs[edit]
- The rare Telvanni Robes can be looted from Ildari Sarothril. Neloth wears a set as well, but this is the only player-obtainable version of them.
The Unofficial Skyrim Legendary Edition Patch, version 2.0.9, fixes this bug.
