Skyrim:Forgotten Names
|
||||||||||||||
Quick Walkthrough[edit]
Note: This quest does not appear in your journal.
- Discover a strange gauntlet in The Midden Dark.
- Investigate the surrounding area to find a key and an incident report.
- Retrieve the missing rings mentioned, located in the Arcanaeum.
- Return to the gauntlet and place the rings in their correct places.
- Decide whether to kill or help release Velehk Sain.
- Claim your treasure (if you spared Velehk Sain).
Detailed Walkthrough[edit]
The Midden Dark[edit]
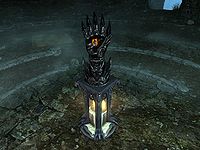
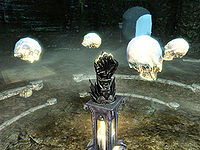
While exploring The Midden Dark beneath the College of Winterhold, you will discover a circular room littered with blood and skeletons. In the center of the room sits a small statue in the form of a gauntlet. On the table nearby there will be a key and an incident report which describes a failed summoning ritual and four rings.
Ornamental Rings[edit]
Following the clues in the report, the player can find the needed rings in a master-locked chest located in the Arcanaeum. The lock can be picked, or simply opened with the key, in order to obtain the four ornamental rings: Pithi's Ring, Treoy's Ring, Balwen's Ring, and Katarina's Ring. Note that the rings are owned, and removing them from the chest is considered stealing and any mages in the library (including Urag gro-Shub) will attack if they see you take the contents of the chest. To reduce your risk of detection, you can either wait until Urag retires to his room at night, or enter the library immediately after finishing "The Eye of Magnus", as he won't be there right away.
Once you have obtained the rings, return to the gauntlet in the Midden Dark.
Place the rings on the gauntlet by activating each finger as follows:
- Index Finger: Katarina's Ring
- Middle Finger: Treoy's Ring
- Ring Finger: Balwen's Ring
- Little Finger: Pithi's Ring.
The Summoning[edit]
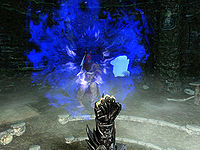
Once all four rings are placed on the appropriate fingers, the fingers will curl into a fist, and a Dremora pirate named Velehk Sain will be summoned. He will bargain with you for his release, offering treasure from his pirating days in exchange. You can choose out of two options:
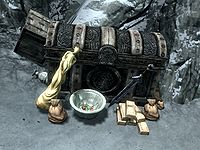
- Release: If you release him, he will vanish and you will receive Velehk Sain's Treasure Map. The map leads to a hidden stash of treasure (leveled general treasure), located west-northwest of Winterhold, and north of Saarthal, on a peninsula with a statue of Talos. Note that there are several statues of Talos in the surrounding area; the one you need is the one where the statue is at the very apex of the small island. (map). The treasure is magically hidden and will only reveal itself if Velehk is released. The treasure is conjured by your proximity, so you will not see it from a distance.
- Kill: You can opt to kill him and loot his corpse for two scimitars, a daedra heart, Hammerfell garb, and Redguard boots.
Notes[edit]
- Script notes attached to this quest indicate that at one point, you were meant to put the souls of the students to rest, and could've spoken to them through soul gems. These script notes include "player has put all the souls to rest. except for Treoy", "player has put 3/4 souls to rest. Neccessary stage?", and "player has spoken to Treoy's Gem". There is also a reference to a "Massive Soul Gem" in the same script.
- The script also makes reference to a fifth deceased student, named "Herotus", who isn't mentioned anywhere besides this script.
- A script, as well as the internal name of his ring, refers to Pithi as "Pithiken".
- Unlike other quest items, the rings can be removed from your inventory. Velehk Sain cannot be summoned without the rings, so you should be careful not to misplace them.
- The rings are ornamental only and as such cannot be worn by you: they will be stored with miscellaneous items in your inventory, instead of apparel.
- If you are quick enough and have a strong enough weapon (as Velehk has much less health than regular dremora), you can release him, get the map, and then kill him as he disappears. His body will vanish before it can be looted. However, if you exit the conversation after you pick the option to release him and before you get the map, you can kill him quickly enough for his body to be looted.
- It is, however, possible to pickpocket Velehk Sain for his weapons and armor (though not the Daedra Heart, obviously) with the Misdirection and Perfect Touch perks. Simply kneel behind the spot where he appears, go through the dialogue as if you're going to let him go, and leave the conversation immediately after you select "Velehk Sain I release you." Then, pickpocket him for all available items. This will cause a glitch however which makes him start all the dialogue over again. Go through and release him once again, then claim the treasure.
- The game doesn't trigger the treasure to appear as soon as you select the "Velehk Sain, I release you" dialogue option. Instead, the trigger is at the end of the dialogue line, after Sain says "See you on the other side, mortal". The implication of this is that if you're pressing the activate button to skip through the dialogue more quickly, you can actually cause the game to not trigger the treasure to appear. If you're electing to take the deal, allow Sain to speak instead of skipping through the dialogue to ensure you get the treasure.
- Once the gauntlet summons Velehk and you decide his fate, the rings that were placed on it cannot be removed, so you can't take them back for either keepsakes or selling them.
Bugs[edit]
- The rings might disappear if you store them in a chest, even if it's considered a safe container. ?
Quest Stages[edit]
- All of the quest stages are empty: 0, 10, 40, 50, 75, 80, 100.
- Any text displayed in angle brackets (e.g.,
<Alias=LocationHold>) is dynamically set by the Radiant Quest system, and will be filled in with the appropriate word(s) when seen in game. - Not all Journal Entries may appear in your journal; which entries appear and which entries do not depends on the manner in which the quest is done.
- Stages are not always in order of progress. This is usually the case with quests that have multiple possible outcomes or quests where certain tasks may be done in any order. Some stages may therefore repeat objectives seen in other stages.
- If an entry is marked as "Finishes Quest" it means the quest disappears from the Active Quest list, but you may still receive new entries for that quest.
- On the PC, it is possible to use the console to advance through the quest by entering
setstage dunMidden01QST stage, wherestageis the number of the stage you wish to complete. It is not possible to un-complete (i.e. go back) quest stages, but it is possible to clear all stages of the quest usingresetquest dunMidden01QST.


