Online:Blood of the Reach
|
Quick Walkthrough[edit]
- Talk to Nolovan in his shop.
- Find the rebels.
- Seal a pact with Arana.
- Search for Bthar-Zel.
- Find the Arkthzand Keystone.
- Talk to Count Verandis Ravenwatch.
Detailed Walkthrough[edit]
Verandis is intrigued by this "Arkthzand Keystone" Rada al-Saran mentioned during the meeting you overheard. He asks you to investigate while he searches for the rebels. He points you towards Nolovan, a Reachman who is obsessed with Dwarven scrap. He owns a shop in southeastern Markarth, near the wayshrine. Head on over there and ask him if he knows anything about the Arkthzand Keystone. He says that you may be able to find something related to what you seek in Bthar-Zel. You can either purchase a map that leads to Bthar-Zel from him for 69 gold, or you can do a simple job for him in exchange for the map.
If you decide to run an errand for Nolovan, you'll need to exit Markarth's eastern gate and follow the river to the southeast. Cross the bridge south of the North Markarth Wayshrine and head towards the circle of three houses. The Package for Nolovan is on a table in the abandoned house at the base of the southern cliff. Once you've retrieved the package, return to Nolovan in his shop and exchange it for the Bthar-Zel Map. As you go to leave the store, you'll find Gwendis near the exit. She tells you that Verandis made contact with the rebels, and that you can find them at Rebel's Retreat, an old Nord ruin in the center of the Reach. Verandis would like to speak with you, so you should make haste.
Head across the river from the Rebel's Retreat Wayshrine and climb the stairs up the ruin. Arana, her bodyguard, and Verandis are standing near the general goods store. Speak with Arana. She agrees to assist you, but insists that she performs a ritual to see if the spirits will bless your alliance. She asks you to collect a few components needed for the ritual: a briar heart seed, a Hagraven's eye, and a handful of bright river-shale.
You can find the Briar Heart Seed in the hills south of Rebel's Retreat, at the Cinder-Heart Clan Camp. The Bright River-Shale is located along the river bank to the northwest. The rock is guarded by a spriggan and a mudcrab. You can recover a Hagraven Eye east of Rebel's Retreat and northwest of the Harrowed Haunt Ritual Site. A hagraven named Antra lives there, and keeps one of her eyes in a jar to perform rituals. Once you have all three components, return to Arana. She instructs you to throw the components into the ritual fire she's started. Once you do, she calls to Hircine to seal your alliance. The a pillar of flame erupts from the fire pit, and the image of the Serpent constellation forms in the cloud of smoke. The pact is sealed, and now you need to investigate the three locations marked on the map to Bthar-Zel.
The first location is just northeast of the North Markarth Wayshrine. A plaque depicting the Thief constellation is located here. The second location is a ways north of the first location, north of the Arkthzand Great Lift and east of the Black-Moon Clan Camp. A plaque depicting the Mage constellation is located here. The third location lies northwest of the second; east of the Druadach Mountains Wayshrine and north of the Black-Moon Clan Camp. Here, you'll find a plaque depicting the Warrior constellation. After you investigate all three plaques, Arana has an epiphany. She realizes that the positions of the three plaques form most of the Serpent constellation. She points out the space where the Serpent's "head" should be on the map, and says that there may be another plaque at this location. To find the Serpent's "head", you'll need to head north of the Druadach Mountains Wayshrine, towards Deep Folk Crossing.
At Deep Folk Crossing, you'll see a puzzle consisting of three Dwarven puzzle cubes. You'll want the correct symbols facing towards the stairs leading up to the top of the platform they're set upon. You'll want the Warrior showing on the cube in the center (interact with it three times), the Thief pointing forward on the cube to the right (interact with it three times), and the Mage pointing forward on the cube to the left (interact with it twice). Once a cube is in the correct position, it begins glowing blue. The door to Bthar-Zel will appear once all the cubes are facing in the correct direction, and Arana will experience a piercing headache. Speak with Verandis, and then proceed into Bthar-Zel.
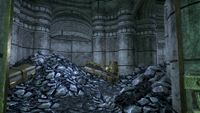
You're going to want to head east from the entrance, towards the center of the ruins. You should find yourself in a large chamber reminiscent of a city square, complete with some kind of forge. Once you enter this room, head south to reach Bthar-Zel's Vault. There's silver in the vault, which the rebel's crafters can use to forge weapons for use against the Gray Host. Navigate the vault and enter the keystone chamber. When you approach the keystone's chamber, you'll see Verandis and Gwendis in the chamber. Rada al-Saran appears and freezes them in place, allowing Lady Belain to take the keystone. The Dwarven Dynastor drops from the ceiling. Defeat the Dynastor and head up the lift to the south to enter Blackreach. This is where you and Arana will part ways, for the moment. She needs to head back up to the surface to send her crafters to retrieve the silver you found.
You should head west and look for Verandis, who is just outside. Rada al-Saran and Lady Belain escaped across the river, and were heading towards the Dwarven structure in the distance. Gwendis insists on pursuing them, and disappears in a cloud of red mist. Speak with Verandis to plan your next step.
Quest Stages[edit]
<Alias=LocationHold>) is dynamically set by the game and will be filled in with the appropriate word(s) when seen in game.
- Not all Journal Entries may appear in your journal; which entries appear and which entries do not depends on the manner in which the quest is done.
- Stages are not always in order of progress. This is usually the case with quests that have multiple possible outcomes or quests where certain tasks may be done in any order. Some stages may therefore repeat objectives seen in other stages.
| Prev: The Despot of Markarth | Up: The Reach | Next: The Study of Souls |


