Skyrim:The Only Cure
|
Quick Walkthrough[edit]
- (Optional) Meet with an Afflicted Refugee.
- Travel to the Shrine to Peryite.
- Gather items needed by Kesh the Clean to make incense.
- Inhale the incense fumes and speak to Peryite's apparition.
- Kill Orchendor in the Dwemer ruin Bthardamz.
- Return to the shrine for your reward.
Detailed Walkthrough[edit]
Escaped Afflicted[edit]
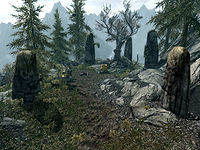
You may encounter an Afflicted Refugee during your travels, once you have reached level 10, who asks you to stop "ogling the grotesque". He will say, when asked about his unhealthy appearance, that he suffers from the plague and would have died years ago without Peryite's protection. He will point you to Kesh at the Shrine to Peryite for more information before continuing on his way to High Rock, adding an objective to your journal. The shrine is located in The Reach, far to the northeast of Markarth, a short walk northwest of Karthwasten, a little southwest of the Dragontooth Crater landmark.
A Lonely Worshipper[edit]
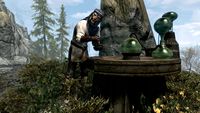
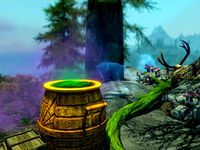
You will arrive at the shrine after being directed by the Afflicted Refugee, or simply find the way on your own after level 12, and you will notice that the shrine is relatively humble, containing little more than a table holding the Speech skill book The Buying Game, a cooking pot, an Alchemy Lab, and an odd-looking golden cauldron. The only remaining worshipper of Peryite is a Khajiit named Kesh the Clean who wanders about the shrine. When you approach Kesh, he will be quite surprised to see another person at the remote shrine. When you ask for an audience with Peryite, Kesh will advise you that, to gain one, some incense is needed and creating this incense involves mixing four items in the cauldron, each of which you will need to supply.
Crafting the Incense[edit]
Specifically, Kesh needs one of each of the following: Vampire Dust, a Silver Ingot, a Flawless Ruby, and a Deathbell flower. He will recommend shops for the dust, mines for the silver and ruby, and the frozen tundra for the flower, though he will warn you that obtaining vampire dust from Vampires can be very dangerous.
Note that if you already have some or all of these items in your inventory, you will have to drop them after Kesh tells you to collect them, and then pick them back up. Otherwise, the quest objective will not tell you to deliver the ingredients to him. Alternatively, you can put them in a nearby unused cooking pot and collect them after.
- Flawless Ruby: This is probably the hardest of the items to obtain, as the standard way of doing so depends on randomly finding one while mining.
Just southwest of the Shrine and directly east of Ragnvald (on the other side of the mountain) there is a small Dwemer ruin haunted by a whisp-mother. There is an unlocked chest embedded behind a concrete slab along the outer region of the mesa, amidst a dense layer of fog, which may contain a flawless ruby.
You can dependably pick one up from inside Shriekwind Bastion: Halfway through the dungeon, locate a blood-spattered room containing a single throne. Examine the floor near the unlit fire pit on the right for the ruby. The dungeon is inhabited by Vampires, so you can also obtain the Vampire Dust while there.
Alternatively, you can find a Flawless Ruby on a remote boat wreck north of Reachwater Rock at a bend in the river there (map). The wreckage contains various gems (the ruby can be hidden under one of the seats, so look around at all angles to make sure that you find it).
- Vampire Dust: If you intend to get the ruby from Shriekwind Bastion, slay one of its vampires for its dust while there. Otherwise, any vampire dungeon will do.
- Silver Ingot: To obtain this, follow Kesh's advice. Head east down the mountain from the shrine and locate the mining town of Karthwasten. Just outside the entrance to Fenn's Gulch Mine is a smelter with several silver ingots scattered around.
- Deathbell Flower: Deathbell can be found all over Skyrim, either as plants or as cuttings. The biggest concentration can be found in the Forelhost Refectory. The flowers appear in abundance in and around Solitude. They can be picked, or cuttings stolen, from the main trading room of Angeline's Aromatics and the teachers' rooms in the Bards College. Many of these flowers can also be harvested in the depths of Forsaken Crypt, and the swampy marshes north of Morthal teem with them. A quick way to get a deathbell is to travel to the Abandoned Shack, where there is a sample just outside the front door.
Once you have collected one of each item, a quest update will direct you to return to Kesh at the shrine. When you hand him the ingredients, he will head to the cauldron and prepare a mixture yielding fumes. He will then ask you to inhale deeply to summon Peryite. If you talk to Kesh before he finishes mixing, the next quest objective may fail to activate.
Inhale Deeply[edit]
As soon as you inhale the fumes, a quick flash will give way to a surreal experience, with the world around you painted in misty deeply-saturated colors, and a few ghostly skeevers will appear. Peryite will then speak thusly, "Breathe deep, mortal. I would have you hear me well, so let these vapors fill your lungs." Asking Peryite if you were poisoned will elicit, "In a sense, but no more poisoned than a fool after too much wine." When asked what he wants he will explain, "I have watched you for some time, you know. The decisions you've made intrigue me, and I wonder if you are a proper agent for a task of mine. I sent a blessing to Mundus, a wasting plague that infected a scattering of Breton villages. One of my monks, the elf Orchendor, was sent to gather these Afflicted. He shepherded them into Bthardamz for me, but has since lost his way. I will not stand for betrayal. I want you to go to Bthardamz and Kill Orchendor, in my name." He will then disappear and the cauldron will be deactivated. Back in the real world, both Kesh and your map marker will point you to the Dwemer ruin of Bthardamz, easily reached by foot from the shrine. The ruin is expansive; you may wish to stock up on supplies before the lengthy trek through it.
Bthardamz[edit]
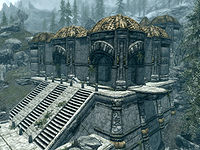
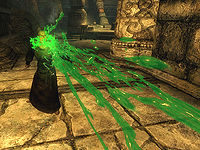
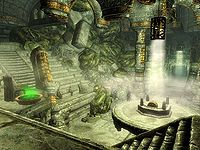
The exterior area of Bthardamz is as huge as the ruin itself. Watch out for patrolling Afflicted and their poisonous vomit attacks. Locate the entrance, pull the handle to release the iron bars and head inside the introductory room for a bit of treasure. Finally, take a deep breath and enter the ruin itself, Bthardamz Upper District.
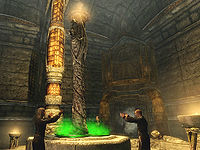
Upon entering, notice the many cauldrons with green fumes similar to the one back at the shrine. While these pose no threat, the Afflicted inhabiting the entire ruin will attack you on sight. Though their illness renders them weak individually, they are dangerous in groups. At the first intersection, either pick the lock on the gate to the north, or take the long way through a sleeping area and fight the opposition. A locked cage in the northeastern room contains a chest. Further north there are three Afflicted praying in a large room. If you approach in sneak mode, you can overhear them and learn about the mixture of despair and fanaticism among the Afflicted:
Afflicted (female): "Peryite, heed our call if you deem us worthy. Our leader, Orchendor, has led us here and for that we are thankful. He has shown us that our suffering is not a punishment, but a blessing."
Afflicted (male): "Yes, a blessing. For many months we have sought your guidance, yet we have heard nothing from you. If we do not please you, give us a sign so that we may understand why."
Afflicted (female): "Yes, a sign. We are lost without your guidance. On the ninth of Rain's Hand our prayers went unanswered, yet here we stand, not faltering in our belief that soon you will show yourself to us."
Afflicted (male): "Yes, show yourself to us. Until that day, we will continue to devote our lives to you and suffer for you."
Afflicted (female): "Yes, suffer for you."
Keep heading west until you reach a large chamber with four Afflicted. Release them from their pain and pull the handle on the northern ledge. This will lower the bars blocking your progress to the south and provide access to a cave-like structure with a treasure chest hidden underneath the entrance. At the next intersection, consider examining the room to the east, but beware of a surprise attack from two Dwarven Spheres. Take the southern path, avoiding the pressure plate that activates two swinging blade traps. The last room contains three Afflicted enemies and the entrance to the next zone, Bthardamz Workshop.
Workshop[edit]
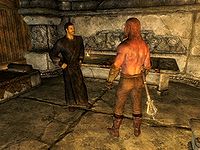
The workshop contains three entrances back to the first zone, Bthardamz Upper District. You will arrive from the eastern entrance to living quarters with two Afflicted, a mage and a melee fighter. You may witness a scene in which the melee fighter wakes up the mage, bringing orders from Orchendor:
Afflicted (melee): "I'm sorry to wake you, my Brother. I have a request from Orchendor."
Afflicted (mage): "Yes, what is it?"
Afflicted (melee): "He requests more barrels of ichor to be delivered to the Arcanex tomorrow."
Afflicted (mage): "This is the reason you wake me? I already have Orchendor's request taken care of."
Afflicted (melee): "I'm sorry my Brother."
Afflicted (mage): "Now leave me to my sleep. My strength and patience are waning."
Afflicted (melee): "Yes, my Brother. Forgive me. May the blessing of Peryite be with you."
Afflicted (mage): "Yes, yes, as with you. Now be off."
Further on you will have no choice but to go for one of the two southern entrances. Both of these are accessible from the huge southwestern chamber, which is guarded by three Dwarven Spider Workers. The door at the top of the stairs leads to a previously inaccessible area of the Upper District (you will be able to see the door you previously used from above), while the southernmost door (where the map marker leads you) takes you to the ground floor area of the previously inaccessible Upper District. Take a bit of time and explore the area and the rooftops, although only a limited amount of treasure can be found.
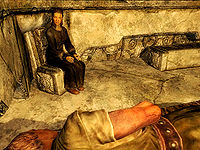
Optionally, you can locate the entrance to Bthardamz Dwelling. If you enter in sneak mode and wait a moment, you may hear the voice of a woman speaking softly. The Afflicted's monologue at her sleeping brother's bed will give you even more insight into the situation of Orchendor's followers:
"Are you asleep? I know you can't hear me, brother. I don't like what we've become. We've been here so long and what do we have to show for it? Orchendor promised a place where we would be accepted and taken care of. He promised Peryite would be present at all times and give us comfort in our suffering. Forgive me for saying this, brother, but I have not felt Peryite's presence. I want out. I want to leave this place. I long for the fresh air of the Reach. This place only makes us sicker. But who am I kidding, I know you wouldn't let me leave, brother. You truly believe in Orchendor and his promises. I know this place will eventually kill us. I have come to accept that. But I will always regret that day I introduced you to Orchendor."
Unlock the gate to access a chest and the Speech skill book Biography of the Wolf Queen before continuing on to the Upper District. Locate the set of stairs just northeast of the Dwelling entrance and proceed upwards, all the way to the ceiling, then enter Bthardamz Lower District.
Lower District[edit]
Proceed forward to the first room and examine the cage for some minor loot. Fight two Dwarven Spiders in the corridor and enter a huge arena-like chamber with three Afflicted guards. Pull the lever and use the trap in the center of the room to your advantage, then take out any remaining enemies. Proceed east through another tunnel until you arrive in a multi-level chamber featuring numerous platforms and a small underground lake. Start by exploring the ground floor area, killing enemies sequentially if possible, otherwise they can easily group up on you. Once you have crossed the river, move through the gate and then through a stone archway. The archway has a pressure plate witch activates a swinging bar trap above. There is also a lever on the right which will reset the trap.
The stairs to the north lead to a circular pathway surrounding a waterfall. As you travel up the stairs, jump right onto the ledge north of the opening into the main chamber. Take an immediate right and down a narrow path to find a skeleton and an unlocked chest. Go back to the upper pathway then head back down stairs and travel east. There is a gold ore vein on the ground next to the wall beside the base of the staircase. Follow the path to the right, watching out for three patrolling Afflicted, and head up the stairs. On this platform you will find a Dwarven Spider and a Dwarven Spider Worker. Cross the winding path to the south to find the entrance to the Bthardamz Study.
Upon entering the Study, open the gate to your left to enter an office-like room containing a chest with minor loot. Open the double doors to the south to find a set of stairs with a spinning blade trap. There is a large button at the base which activates it. As you progress to the upper level you will encounter a Dwarven Sphere. Take a moment before climbing the next staircase to loot the chest to the left of the altar on a dais beside some barrels of ichor. Turn west and continue up the second set of stairs to find the passage leading to the second level of the Bthardamz Lower District.
A passage with tables on both sides opens up to a view of the entire Bthardamz Lower District. Observe the waterfall passing through the circular platform above where the chest was found, as four afflicted will pass through the sequence of archways which opens up directly behind the waterfall. Either snipe them as they pass by the falls or face them head on. Head down the short ramp to the north and turn right to find a gate to a room containing a chest with minor loot. To the right are two curved ramps leading to a landing containing three Afflicted and a chest on the wall near the tables, but which is otherwise a dead end. Head south and follow the path to the doors to Bthardamz Arcanex, where you will finally face Orchendor.
Showdown[edit]
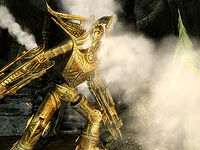
The Arcanex zone resembles the previous zone with its multiple levels, and is crawling with enemies, including Dwarven Spiders and Spheres. The water holds nothing of interest, so fight your way through the chamber and take the steep slope upstairs. Before entering the building-like structure below the ceiling, take a quick detour to the left for a bit of treasure, then face a Dwarven Centurion and a few Spiders—the last guardians before the final showdown against the treacherous Wood Elf.
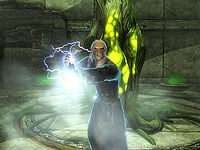
Orchendor is a powerful Spellsword who knows several protective spells and magical barriers that increase his magic defenses to as high as 80%, making him a hard opponent for mages. He also knows Invisibility, Teleportation, and Ice Storm spells, and as an Afflicted he can use the toxic vomit attack as well. Loot his body once it is over for the elevator key, a boss-leveled amount of gold, the Alteration skill book Reality & Other Falsehoods and several other valuable items. Head to the upper level and locate the locked door, then enter for a chest and an elevator ride towards some much-needed fresh air. It's time to head back to Peryite for your reward.
Spellbreaker[edit]
Back at the shrine, Kesh continues to wander around aimlessly. Asking his permission to take another breath of the fumes will gain you entrance once again into the surreal world of Peryite, who will say, "Well done, mortal. All things are in their order, and Orchendor roams the Pits. His betrayal will be punished, and your obedience is rewarded." When you bid him farewell, he will hand you the Spellbreaker, a unique shield capable of protecting from both magic and sword. The cauldron will then be empty and you can do nothing but leave Kesh the Clean to his lonely existence at the Shrine to Peryite.
Notes[edit]
- Even after being re-animated, Orchendor will retain his immunity to fire, frost and shock magic and all of his spells. This, combined with his level cap, makes him one of the best targets for Dead Thrall.
- If you have accidentally killed Kesh before first talking to him, you can still begin the quest by having the required items in your inventory and activating the Cauldron. The potion will automatically mix and the quest will begin.
- After giving Kesh the ingredients, you can pickpocket him as he is stirring the cauldron to steal back the ingredients you just gave him.
- After finishing this quest, you can randomly encounter two-three hostile Afflicted in the wilderness who will try to enact vengeance on you for killing Orchendor.
Bugs[edit]
- If you talk to Kesh while he is creating the incense, you may not get the next quest update.
The Unofficial Skyrim Patch, version 2.0.4, fixes this bug.
- Cancelling while talking to Peryite may cause you to get stuck when he is finished, as you cannot move or select anything once you have inhaled the incense.
- Orchendor's body may vanish before you have a chance to loot the key.
- Peryite may not give you Spellbreaker upon completing the quest. Although quest mark directly indicates the incense, talk to Kesh first for permission to commune with Peryite.
- Sometimes after the player kills Orchendor the quest marker will still show at him and the quest cannot be advanced further.
The Unofficial Skyrim Patch, version 1.3.3, fixes this bug.
Quest Stages[edit]
| Introduction (Da13Intro) | ||
|---|---|---|
| Stage | Finishes Quest | Journal Entry |
| 1 |
Objective 0: Find Kesh at the Peryite Shrine
|
|
| The Only Cure (DA13) | ||
| 10 | A Khajiit named Kesh has offered to help me commune with Peryite. He asked me to acquire a deathbell flower, flawless ruby, silver ingot and some vampire dust.
Objective 11: Obtain some Vampire Dust
Objective 12: Obtain a Deathbell Flower
Objective 13: Obtain a Silver Ingot
Objective 14: Obtain a Flawless Ruby
|
|
| 21 | There is a fuming incense at the wilderness shrine to Peryite. Inhaling this is supposed to help me commune with the Daedric Prince.
Objective 20: Inhale the fumes
|
|
| 40 | The Daedric Prince Peryite has solicited me to kill an elf named Orchendor.
Objective 40: Kill Orchendor
|
|
| 75 | I have killed Orchendor, as instructed by Peryite.
Objective 75: Report Orchendor's death to Peryite
|
|
| 100 | ||
| Unknown |
Objective 15: Deliver the Ingredients
|
|
- The following empty quest stages were omitted from the table:
- Da13Intro: 0, 100.
- DA13: 0, 1, 5, 11, 15, 20, 30, 31, 45, 50, 80, 81.
- Any text displayed in angle brackets (e.g.,
<Alias=LocationHold>) is dynamically set by the Radiant Quest system, and will be filled in with the appropriate word(s) when seen in game. - Not all Journal Entries may appear in your journal; which entries appear and which entries do not depends on the manner in which the quest is done.
- Stages are not always in order of progress. This is usually the case with quests that have multiple possible outcomes or quests where certain tasks may be done in any order. Some stages may therefore repeat objectives seen in other stages.
- If an entry is marked as "Finishes Quest" it means the quest disappears from the Active Quest list, but you may still receive new entries for that quest.
- On the PC, it is possible to use the console to advance through the quest by entering
setstage DA13 stage, wherestageis the number of the stage you wish to complete. It is not possible to un-complete (i.e. go back) quest stages, but it is possible to clear all stages of the quest usingresetquest DA13.

