Online:A Flawless Plan
|
||||||||||||||||||||
Quick Walkthrough[edit]
- Talk to Zeira inside Thieves Den.
- Find Percius Loche.
- (If Percius Loche is captured) Go tell Zeira to abandon Percius Loche to his fate.
- (If Percius Loche is captured) Find a Beggar to either Bribe or Intimidate information out of him
- Rescue Percius Loche
- Meet Zeira at Prince's Gate and travel to al-Danobia tomb.
- Make your way into the al-Danobia tomb.
- Bypass Tu'whacca's Pillars and explore HoonDing's Passage.
- Walk Malooch's Path with Zeira.
- Cross Shinji's Truth.
- Defeat the guardian in front of the treasure vaults.
- Meet Zeira at Nicolas' Desert Retreat and search the place.
- Return to Thieves Den to talk to Zeira.
Detailed Walkthrough[edit]
Upon starting the quest, you will immediately figure out that Zeira wants to finish what the guild started at al-Danobia Tomb. This is essentially a combat mission, not a stealth mission, certainly if you find Percius Loche before the Iron Wheel. If you have gear for both, make sure you're wearing your combat gear, not your stealth gear!
Finding Percius Loche[edit]
When you enter the Diamond Thimble, you will find a mess, and Percius Loche nowhere to be found. Talking to the clerk, you will learn that this mess is caused by the Iron Wheel, and he had to make a daring escape— unfortunately for him, he fell into a vat of dye. This is fortunate for you, however, as it'll become easier for you to find him.
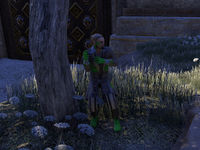
To find the beginning of Loche's trail, head to the shop's eastern exit, and follow the colored footprints to the large intersection nearby. Keep following them, heading up the stairs to the west and climbing on the city's rooftops, passing through Sharper's Alley and continuing south to the large gate of the Warehouse District. You do not need to follow the path, necessarily: once you grab the waypoint in the intersection, immediately head south for the gate and you will find Loche hidden behind a tree. Talk to him for a bit, then Quen will come over to escort him to your heist location.
If you did not manage to get to Loche on time, the Iron Wheel will capture him, and you will have to find out where he's been taken. At this point, you can decide to talk to Zeira about his capture, thus abandoning him, or trying to rescue him from the Iron Wheel. If you decide to try and rescue him, there is one citizen near the Warehouse District gate who can tell you where he's been taken - namely, the Iron Wheel headquarters at No Shira Citadel. The good news is, they haven't taken him into the citadel yet, their usual spot for preliminary questioning is outside the fortress - right next to the No Shira Citadel wayshrine in the south part of Hew's Bane, and guarded by only a couple of guards, so he's comparatively easy to rescue.
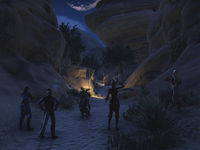
If Percius Loche is present when you meet Zeira's camp, you will have the option of entering through a side door on the eastern side of the temple (The "secret entrance" is the first dotted line on the right, on your map). You may have to isolate and kill one guard to clear the way, or you may be able to sneak past the guard. It is also possible to go to Zeira without him and abandon him to his fate: in this case he will obviously not be present to open the side entrance to the tomb, and you will have to fight your way through the Iron Wheel camp and enter the temple's front door.
Entering the Tomb[edit]
If you've saved Loche from the grip of the Iron Hand, you will be able to enter the tomb via the side entrance— you'll be on your own, however, and will need to fight your way past a number of ancient guardian warrior statues which will animate one by one. There are traps at doorways (there doesn't seem to be much way to avoid these), trapped urns (do not approach, or if the floor starts glowing green when you do, get out of the radius fast) and finally a tough fight against a Gargoyle. You will then enter the main entrance chamber from the south, and meet up with the rest of the party, who have somehow sneaked past the Iron Wheel camp. Alternatively, if you entered the tomb through the main entrance, you will come out into this chamber immediately.
Bypass Tu'whacca's Pillars[edit]
You will find several scrolls in the room, one each about Akishu the blade, Buhliz the serpent, Nishka the symbol of pride, and Puntru the scholar. These scrolls are faded to the point of being incomprehensible, however, so you will need to read the journal excerpt from the heist in the center of the room. The hints it gives you are as follows:
- Tunaska stood to the north, with Akishu (symbolized by the blade) and Buhliz (symbolized by the serpent) surrounding him.
- Narimaya faced the south, with Nishka (symbolized by the torch) and Puntru (symbolized by the scroll) surrounding her.
Go to the pillars at the door. You will find that you can turn all six of the pillars, which have a possibility of three symbols each on them. Start with the left side. From left to right, turn the Relief Wheel until you have these symbols: Scroll, Warrior, Torch. Move to the right side and set the following symbols from left to right: Snake, Warrior, Sword. A door to HoonDing's Passage will then become available to you.
Walk Malooch's Path[edit]
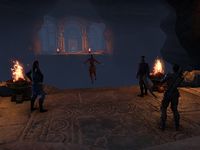
After exploring the room, follow Zeira to Malooch's Path, via a door to the west. She will explain how the trap works, and you must then follow her along the maze-like path while Velsa uses the panel. The darkness will do large amounts of damage if you linger in it, so make sure you spend as little time in it as possible.
The path is quite twisty, and Zeira will first go the spot where her previous companions died— but, for some reason, there is no evidence of their bodies. Along the way, you will be attacked by statues that attack one or two at a time. Stay within the light and close to Zeira. Once you reach the other side, examine the urn and take Tall Papa's Ashes from the ewer. After speaking with Zeira— and listening to her doubts—, use the doorway nearby to easily return to the other side.
When Zeira tells Velsa to let go of the panel, the two of them have a heated conversation. It becomes apparent why Velsa distrusts Zeira now— she believes that Zeira was the reason of the others' demise long ago, as she failed the same task that she asked of the Dunmer due to a feeling of self-righteousness. As a consequence, it, apparently, lead to a majority of the guild's current problems.
Cross Shinji's Truth[edit]
When you return to the chasm, Quen will be "floating" in mid-air, thus revealing a magical bridge. Zeira tells you to use the ashes to reveal the bridge. Approach Quen and use the ashes when prompted, then follow the path along as it's revealed. When the ashes run out, use them again to reveal more - four or five times should get you across, where a gargoyle awaits.
Kill (or sneak around) the creature and enter the vault to continue.
Defeat the Vault Guardian[edit]
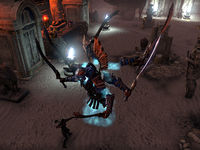
Upon entering the vault, the group is presented with a large guardian (Lakayd the Repentant) who asks for a pass-phrase. Given that none of you know it, you have to fight him instead.
The fight can be pretty tough - Lakayd does a spinning move that can easily kill even high players. He also splits into smaller aegis statues, which will heal him if not killed. Ranged players can shoot him from afar, while melee players must kite him around the room. Run or roll away when he does the spinning move (a circle on the ground shows its range). If you die, use the wayshrine option to resurrect - it will place you at the top of the stairs, and if the guild NPCs are still in combat with him, his health will not be reset.
Once he dies, you can enter the treasure room to continue.
Investigate Nicolas' Retreat[edit]
When you enter the Treasure vault, you will notice it is relatively bare. Examine what was left behind to learn what happened to it.
Interacting with the coded map, Velsa says, "Let me see that. Nicolas used half-maps like this—thin overlays placed atop existing maps. You line them up with common points of reference."
Interacting the Torn Journal Page, Walks-Softly comments, "That page, is it from the journal Nicolas kept?"Tu'whacca watches over you." The pass-phrase for the crypt guardian? I nearly had it!"
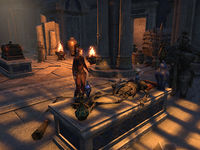
Interacting with the Headless Skeleton, Quen mentions, "What's wrong with that skeleton? Missing its head? Looks like it was hacked off. Must have been done by whoever stole the dowry … but why desecrate a skeleton?"
Talk to Zeira, who pieces together the evidence left behind— and her previous doubts— and figures that Nicolas is alive. Using the map found in the vault, Zeira determines that Nicolas had a retreat in the desert. Leave the tomb and descend the cliffs, returning to Abah's Landing on a nearby camel. Meet Zeira at the desert retreat, close by Prince Hew's Shuttered Tomb, to investigate further.
The door is locked, with Intermediate difficulty, and requires you to pick it. Despite you trespassing, the area isn't restricted, so you can freely walk about. Examine the Stack of Papers, Clothing Chest, Danobia Coins, and Blood-Filled Crystal. Zeira will deduce everything for you: the crystal held al-Danobia blood, allowing him to bypass Malooc's Path; the lamp she saw there was the one he used to find his way to the ewer; and he was able to leave unscathed by knowing the pass-phrase. The betrayal of the guild— and his deal with Cosh— pushes Zeira to leave, informing the guild of Nicolas' treachery.
Head back to the Thieves Den for your reward.
Notes[edit]
- Prior to Update 39, this quest required you to have reached Thieves Guild Rank 5.
- Even if you do not save Percius Loche from being taken in by the Iron Wheel—or spring him out of jail afterwards—he will be back in his shop in time for the next quest.
- The objective "Talk to Zeira" completes simply upon arriving at the Prince's Gate, instead of actually speaking to her.
- The al-Danobia Tomb area is instanced.
- While displayed as a hint required to progress the quest, speaking to Zeira upon arriving at the al-Danobia tomb isn't mandatory.
- The same occurs again towards the end of the quest after investigating the treasure vault.
- While Percius Loche states that his side path into the tomb is filled with traps and hostile guardians, none are actually present and the path offers a safe direct way into the puzzle room.
- The journal excerpt located in the Tu'whacca's Pillars puzzle room lacks the typical golden glow of readable notes.
- The same applies for the stack of papers in the desert retreat later in the quest.
- The invisible bridge over Shinji's Truth won't exist before reaching the related objective.
- It's possible to exit the treasure vault via the shortcut back outside without completing the objective inside. However, the door is one-way only so you will have to make the entire way back to the treasure vault to resume, so it's not advised.
- The Iron Wheel enemies are gone from their camp outside the tomb after completing the objectives inside.
- While a camel is offered to ride back to Hew's Bane, simply walking down the path just behind it will trigger the loading screen that brings you back anyway.
- Back in Hew's Bane, when speaking to Zeira, she tells you to return to Abah's Landing, where she says she will meet with you to investigate Nicolas' hideout. However, the hideout is in the wilderness outside of the city, so her asking you to return to Abah's Landing doesn't make sense.
Bugs[edit]
- Upon arriving at al-Danobia Tomb, an objective marker appears over Percius Loche, despite there not being any objective step related to him. ?
- Speaking with him removes the marker.
- It's possible to open the side door into the tomb before Percius Loche interacts with it. ?
- Some of Velsa's dialogue during Malooc's Path lacks audio to match the subtitles. ?
- The prompt to use Tall Papa's Ashes still appear when not looking towards the chasm. Throwing the sands in that direction still reveals the path. ?
Quest Stages[edit]
| A Flawless Plan | |
|---|---|
| Finishes Quest | Journal Entry |
| I should head to the Thieves Den and speak with Zeira about her plan.
Objective: Talk to Zeira
|
|
| Zeira plans to return to the al-Danobia family tomb where Nicolas and the rest of the guild perished. She believes Percius Loche can help, and asked Quen and I to meet him at his shop in Abah's Landing.
Objective: Meet Percius Loche at the Diamond Thimble
|
|
| Percius Loche isn't here, and his shop is in shambles! I should speak with his clerk, Mamaea of his whereabouts.
Objective: Talk to Mamaea
|
|
| The Iron Wheel is after Percius Loche! In his rush to escape from his shop, he stumbled through a vat of bright green dye. I should find where his trail begins!
Objective: Find Percius Loche's Trail
|
|
| There's very little time to find Percius Loche before the Iron Wheel catches him. I should follow his trail of bright green footprints as fast as I can!
Objective: Find Percius Loche Before the Iron Wheel Does
Objective Hint: Follow the Bright Green Bootprints
|
|
| (If you found Loche before the Iron Wheel) I found Percius Loche before the Iron Wheel did. I should speak with him, quickly. Objective: Talk to Percius Loche
|
|
| The matter with Percius Loche is resolved. I should talk to Zeira at Prince's Gate when I'm ready to depart Abah's Landing.
Objective: Talk to Zeira
|
|
| (If the Iron Wheel found Loche before you) There's no sign of Percius Loche. I can only assume the worst. If I can track him down, perhaps I can free him from the Iron Wheel. Alternatively, I could leave him to his fate. If that's the case, I can tell Zeira we should leave without him. Complete one: Tell Zeira to Abandon Percius Loche or Rescue Percius Loche From the Iron Wheel
Objective Hint: there are a few hints that I didn't manage to write down
|
|
| (Either option leads to this choice) When I'm ready, I should speak with Zeira and let her know I'm ready to travel to al-Danobia Tomb. Objective: Travel to al-Danobia Tomb
|
|
| The Iron Wheel has set up camp outside al-Danobia Tomb. I should sneak past the camp in order to reach the entrance.
Objective: Sneak Past the Iron Wheel
Objective Hint: I could speak with Zeira before I leave and see if she has any advice.
|
|
| I should explore al-Danobia Tomb.
Objective: Explore al-Danobia Tomb
|
|
| A great door blocks our way. If we are to advance further into al-Danobia Tomb, I must solve the mystery of Tu'whacca's Pillars. I should refer to Nicolas' journal for hints.
Objective: Bypass Tu'whacca's Pillars
|
|
| Now that we've bypassed Tu'whacca's Pillars, we should venture deeper into al-Danobia Tomb.
Objective: Explore HoonDing's Passage
|
|
| After exploring further into al-Danobia Tomb, we reached an impassable chasm known as Shinji's Truth. I should see what Zeira has to say and follow her lead.
Objective: Follow Zeira's Lead
|
|
| Zeira needs me to watch her back as we walk Malooc's Path. I should stay close to Zeira until we make it through.
Objective: Walk Malooc's Path
|
|
| Zeira and I made it through Malooc's Path. We should recover Tall Papa's Ashes, which will reveal Shinji's Truth.
Objective: Recover Tall Papa's Ashes
Objective: Talk to Zeira
|
|
| I should return to Shinji's Truth with Tall Papa's Ashes.
Objective: Return to Shinji's Truth
|
|
| Shinji's Truth is an invisible path that can only be revealed by spreading Tall Papa's Ashes upon it. I should do so and cross.
Objective: Cross Shinji's Truth
|
|
| Now that I've crossed Shinji's Truth, I should enter the al-Danobia treasure vaults.
Objective: Investigate the Treasure Vaults
|
|
| We awoke an ancient tomb guardian! We must defeat it!
Objective: Find a Way into the al-Danobia Vault Room
|
|
| We should search the al-Danobia treasure vaults for Magnifica Falorah's dowry, or clues to its absence.
Objective: Search the al-Danobia Treasure Vaults
|
|
| Magnifica Falorah's dowry is gone, and Nicolas—the former guildmaster—may have had something to do with it. I should return to Hew's Bane as soon as I can. From there, I will meet Zeira at Nicolas's desert retreat.
Objective: Leave al-Danobia Tomb
Objective Hint: Talk to Zeira
|
|
| Zeira asked me to meet her at Nicolas's desert retreat, in the badlands of Hew's Bane.
Objective: Meet Zeira at Nicolas' Desert Retreat
|
|
| Zeira and I should search Nicolas's desert retreat for any signs of him or Magnifica Falorah's dowry.
Objective: Search Nicolas' Desert Retreat: 0/4
Objective: Talk to Zeira
|
|
| Nicolas betrayed the Thieves Guild! Zeira plans to inform them of his secret deal with the merchant lord, Cosh. I should meet her at the Thieves Den.
Objective: Return to the Thieves Den
|
|
| Zeira plans to inform the Thieves Guild of Nicolas' betrayal. I should speak with her at the Den and find out what we do next.
Objective: Talk to Zeira at the Thieves Den
|
|
<Alias=LocationHold>) is dynamically set by the game and will be filled in with the appropriate word(s) when seen in game.
- Not all Journal Entries may appear in your journal; which entries appear and which entries do not depends on the manner in which the quest is done.
- Stages are not always in order of progress. This is usually the case with quests that have multiple possible outcomes or quests where certain tasks may be done in any order. Some stages may therefore repeat objectives seen in other stages.
