Battlespire:Level 1
Contents
- 1 Quick Walkthrough
- 2 Detailed Walkthrough
- 2.1 Point A - Weir
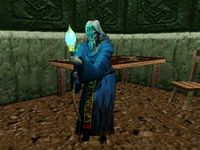
- 2.2 Point B - Wizard of the Gate
- 2.3 Point C - Split-Level Battle Arena
- 2.4 Point D - Green Anchor Room
- 2.5 Point E - Beige Anchor Room
- 2.6 Getting to the Western Rooms
- 2.7 Point F - Dead Dragon's Cavern
- 2.8 Point G - Grey Anchor Room
- 2.9 Point H - High Court Room/Wizards' Audience Chamber
- 2.10 Point I - Formal Hall
- 2.11 Point J - Maze of Rising Platforms
- 2.12 Point K - Pentagonal Cave
- 2.13 Point L - Room of Floating Rocks
- 2.14 Point M - West Corridor/Corridor to the Rope Bridge Cavern
- 2.15 Point N - Temple on the Rock
- 2.16 Point O
- 2.17 Point P - Control Room
- 2.18 Point Q - Battlemages' Private Chambers
- 2.19 Return to Point P
- 2.20 Point R - Star Galley Hangar
- 2.21 Point S - Mock Turtle Room
- 3 Enemies
- 4 Notes
- 5 Bugs
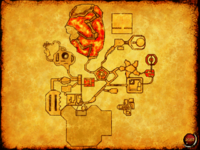
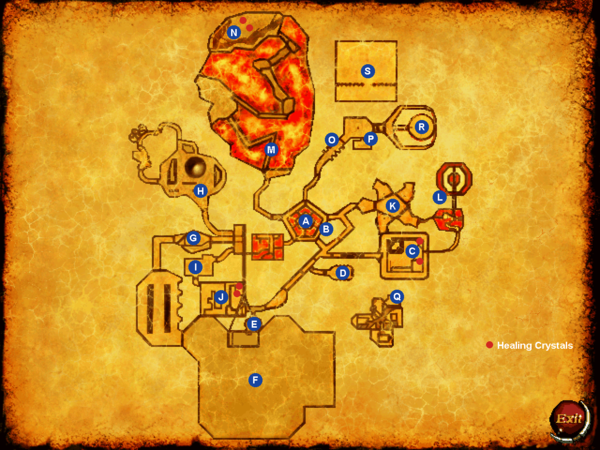
- 6 Map
This level is known as The Weir Gate. Your goal here is to uncover some basic information about what's going on, close the five Anchors, and find five Cogs to gain access to the Star Galley, which will allow you to leave. Almost everything can be done without conversing with any monsters, but doing so does reveal some things.
Keep in mind that large parts of this level (as well as later ones) are open to exploration, and in most cases it is not necessary to visit these locations in any particular order.
Quick Walkthrough[edit]
- Find a Doht Sigil of Entry amulet (2-3 mobs have them). There may be one on the path from Point A to M and near Point I.
- Close the anchors found at Points D, E, G, and O (close means the blue things are together). If all five anchors are severed, Battlespire will be destroyed along with everyone and everything in it.
- Find four Cogs, one each at Points F, I, N, and C.
- Open secret door at Point P and talk with Clarentavious.
- Kill the Dremora Methats at Point H and take his Pauldron.
- Enter the teleporter at Point H and use the password "boustrophedon" to enter the locked door.
- Get the last Cog at Point Q. The anchor at this point is already closed.
- (Optional) Return to Clarentavious with the Pauldron of Lord Methats for the Typos Sophia, a magical staff.
- Place all five Cogs in the control panel at the center of room P, open the door, and board the Star Galley to reach Level 2a.
Detailed Walkthrough[edit]
Point A - Weir[edit]
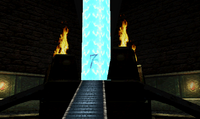
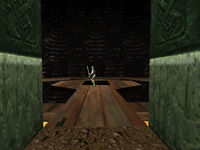
After a disorienting trip through both time and space, you enter the Battlespire at this point. While supposedly you're here for training in the art of magic, you don't see any friendly welcoming party, though that may merely be part of the course.
Point B - Wizard of the Gate[edit]
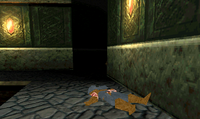
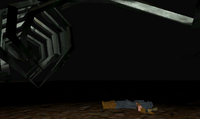
Any thoughts of all this being "part of the training" quickly dissolve when you find the battered corpse of a once powerful mage nearby, surrounded by Scamps. You find two scrolls undisturbed near his body, perhaps they will provide some clues to what is happening?
Read the first scroll; it appears a Daedra Prince has forced entry into Battlespire and has taken over the facility. The second scroll is from a friend of yours, named Vatasha Trenelle (if your character is male) or Josian Kaid (if female). Your friend's note gives you some helpful advice on how to survive, but not much in the way of news. You can attempt to converse with some nearby Scamps. Sometimes they can be persuaded to not attack you (for a while) in exchange for swearing not to hurt them. Friendly Scamps can tell you that you can leave via the "boss sigil" (presumably the one preventing you from leaving), by going with the boss (not a viable option at the present), or by the magic boat. The latter refers to the old Star Galley mentioned in the first scroll. Attempting to locate the Star Galley should be your first course of action.
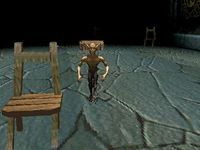
While exploring the Weir Gate, you will encounter three types of Daedra. The Scamps are pesky creatures; they are the easiest to "bribe" out of attacking you, but are easily dispatched if they do. The Vermai are very tough creatures and communication is nearly impossible with them. Finally, the Dremora are an ever-present danger, since they can cast powerful spells to weaken you as they approach. They seem very intelligent, although not as smart as they think they are. By being extremely humble and polite you can occasionally avoid combat. They despise failure and rudeness and will attack immediately if they see either.
You will also find many Sigils being carried by the level's various occupants, all Doht. Most are useless and appear to only serve as a badge of identification. If used, you will become ethereal for a short period of time. It pays to examine them all, however, as you will discover a few are Sigils of Entry. If the scrolls and creatures you talk to are correct, these Sigils of Entry will allow you to pass warding sigils of the same type. Continue carefully through the dungeon, collecting various useful items lying around such as potions, weapons, and armor. You will also find several more scrolls, some containing general knowledge, and some more useful ones which give insight into what happened here and how to correct it.
Point C - Split-Level Battle Arena[edit]
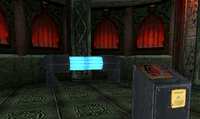
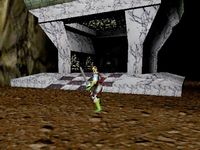
After a terrible battle with a group of fiends, you discover a number of important things here. First, there are two small bluish gems hovering in mid-air. Taking advice from a nearby scroll, you will discover that they restore either your Wounds or Magicka (there is one crystal for each effect). They disappear after use but reappear after a short while, providing a steady—and vital—supply of healing. One of the Scamps you kill here leaves behind a curious item, a Cog of Fang Interleaving. There is no apparent use for this item, but likely provides an important use somewhere, so grab it and hang on to it for now.
Point D - Green Anchor Room[edit]
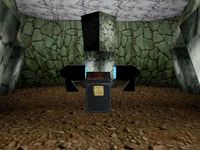
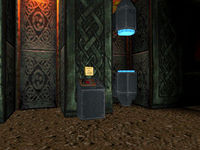
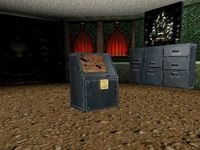
This small room contains a very interesting device. On closer inspection, there is a small plaque underneath the control panel which reads,
- Know that this is one of the five great Anchors that moor the Battlespire in its place and retain it in the life-flood of sustaining Mana, without which there would be no light, no life, no Being.
- In their o'er-reaching wisdom, the Administration has required me, against my every protest and complaint, to affix to it a dreadful device, which you see before you, whose purpose is to sunder and divide this anchor and imperil the Spire and all who inhabit it.
- Never divide the Anchor. It is the rock upon which all our lives are founded. All Anchors must be conjoined to assure the safety and stability of the Spire.
- Above all, never, never, never allow them all to be unloosed. Sure destruction shall follow, as the Battlespire departs the flux that keeps all sides of nature in unity. Now avaunt, and quit this chamber, lest the imp of temptation, or some unhappy humour overcome you, and lead you onto the path of certain annihilation.
- C.V.
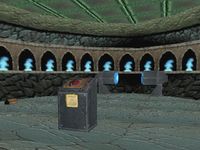
This is one of the five great anchors for the Star Galley which you are searching for. As you learned from the scroll, releasing all five anchors is a bad thing. Activate the control panel, which will close the anchor until you have more information on how to proceed. The other anchors are found at Points E, G, O, and Q.
Point E - Beige Anchor Room[edit]
You find another Anchor here, which must be closed.
Down the hall to the west is a large door. Unfortunately, it doesn't seem you can open it from this side.
Getting to the Western Rooms[edit]
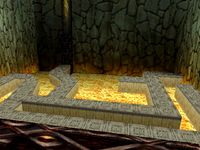
From the central room, take the southwest passage. Before you is a large pit filled with lava and some platforms that are far out of reach to be useful. Search the wall along the edge for a button adorned with the image of a skull. Press it, and one set of walkways rises up to meet you. Head out on this walkway and make your way to the north wall, where you find another button. Press this one to raise the other walkway. Once accessible, make your way to the southeast exit.
Beyond the lava pool is a smaller room with some stairs leading down (granting access to Point F) and three corridors leading west. Your friend has left you another note and some supplies at the bottom of the stairs. They suggest you look for secret doors and find someone named Clarentavious. Additionally, the Daedra in charge around here is the one named Methats.
Point F - Dead Dragon's Cavern[edit]
Enter this large, pitch black room and eliminate the various creatures therein. Deeper inside, you find a wondrous sight—the huge skeleton of an ancient dragon! Beneath the colossal skeleton lies the corpse of another ill-fated battlemage, Samar Starlover. Beside him lies a scroll which reveals a little more of the taking of Battlespire. You will also find the Cog of Futlock Reciprocation in a sack underneath the skeleton's head; grab it and add it to your collection.
Point G - Grey Anchor Room[edit]
In the upper room you find another open Anchor. Battle past the enemies within, then press the button to close it.
Point H - High Court Room/Wizards' Audience Chamber[edit]
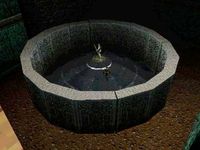
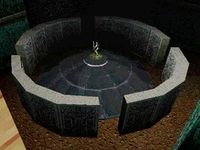
This room contains a large, enclosed stone circle. After a little searching, you discover another skull button which lowers a lift. Ride it up to find another, and a birds-eye view of the mysterious enclosure. Press the button and watch the walls slide open, then head back down. Inside the circle you find a Dremora, Lord Methats (who your friend suggested is the leader around here), along with a pair of Vermai. You can attempt to converse with Methats, but nearly every option ends in a fight. If you have previously learned Methats' name, you may be able to use it to convince the Vermai to join you in the fight. Once Methats is dead, you can recover his magic pauldron.
The symbol in the center of the circle floor is a teleporter. If you have yet to speak with Clarentavious, it may be best not to risk getting too close at the moment.
Passages to the north and west lead into a back chamber filled with supplies.
Point I - Formal Hall[edit]
This room is adorned with tapestries and chairs, and a chest and mace are found on the floor towards the rear wall. The sole occupant of the room is a Scamp. Kill it and take the Cog of Flux Capacitation it carries.
Point J - Maze of Rising Platforms[edit]
You find another pair of healing crystals in this room. One is on the upper level, accessible by the lift platform. There is also a door on the upper level, which opens into the hallway near Point E
Point K - Pentagonal Cave[edit]
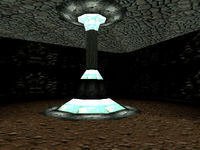
A Dremora guards this room, not always alone. Aside from a brightly lit pylon in the center, there appears to be little else in this room—at first. Upon closer inspection, you find that the northeast wall opens into a small room with a button podium, and another pair of guardians. Pressing the button opens another wall, revealing another room of similar construction, and more monsters. This button opens yet another wall, revealing a third room of the same type. The button in this room, however, opens a passageway to the west.
Point L - Room of Floating Rocks[edit]
You find a particularly interesting room with floating "islands". Carefully jump across to find another room to the north with walkways suspended above more lava. After dispatching the Dremora in this room, step onto the center platform. You discover that it is an elevator, which takes you to a loft with many useful supplies (and a few Vermai). After looting the area, return to the floating islands room. Look across the chasm and you will spot a switch, chest, and a passage leading south. Make a long jump to the platform and press the button, which raises a walkway nearby. Make another great jump to reach the southern passage. While this area is fraught with danger, it does provide you with many useful supplies.
Follow the south passage until you reach a hole in the floor. Drop down and you will be deposited near Point C and its healing crystals.
Point M - West Corridor/Corridor to the Rope Bridge Cavern[edit]
This area has several old, rickety wooden bridges suspended high over a pool of lava. You must take care navigating across them, as there are no hand rails to hold or prevent a fiery death plunge. The first bridge is guarded by a Doht Sigil of Warding; this ward causes damage and death if you approach it—unless you are in possession of a Doht Sigil of Entry.
Point N - Temple on the Rock[edit]
This area contains a small shrine, which is home to two more healing crystals and a Dremora standing nearby. This Dremora is named Rathine, and he would rather speak than fight, and may even initiate the conversation. If you choose your words carefully and be polite, you can avoid combat with him. However, he is in possession of another Cog—and won't give it up without a fight. If you have made him friendly, you have the opportunity to get in a Backstab or Critical Strike on the poor sucker before he becomes violent. If you're lucky, this will make short work of him. Take the Cog of Pinion Precession from his remains.
Point O[edit]
You find another open Anchor here. Close it.
Point P - Control Room[edit]
In the center of this chamber is a podium with two protruding metal nubs. If you have any cogs in your inventory, clicking the panel will place them here. Also affixed to the podium is a plaque, which reads,
- Star Galley Crib Opening Mechanism
- Operation without Permission of His Honor, The Venerable Artificer, is Expressly Forbidden
- Gaze Upon this Device and its Subtle Workings, and Tremble with Wonder!
- By the grace and gifts of Clarentavious Valisious, thus the Star Galley is Made Fast and Secured Thereby.
There is a door leading east, but it does not open, and bears a note,
- Star Galley Crib
- No Admittance
Filing cabinets adorn the north and south walls. Upon closer inspection, the south wall is a secret door; opening it reveals a hidden room. Inside this room hides the battlemage Clarentavious Valisious. Speak to him to discover a number of important things. He tells you to go to his chambers through the teleporter (Point H) and gives you a note with the password "boustrophedon", required to open the way to his inner sanctum.
Point Q - Battlemages' Private Chambers[edit]
This is Clarentavious' chamber, accessed through the teleporter and from the password found at Point P. From the landing point, there are four hallways leading to other teleporters and a locked door, which when interacted with provides a riddle,
- As the Ox Turns in Plowing
Answer "boustrophedon" and the door will open.
You find several important things in these chambers.
- Another Anchor, which is still closed.
- A Cog of Bandy Interfraction, in a bag on the table in the larger room.
- A scroll which details some important information, including:
- Five cogs are needed to open the way to the Star Galley.
- There are five Anchors, all of which must be active (in the closed position) to unmoor the Star Galley.
- An item named the Typos Sophia will protect its owner from being possessed by the Daedra.
Return to Point P[edit]
Return to Clarentavious' hiding spot after visiting his chambers at Point Q. The mage believes the only hope is to release all the anchors and drift endlessly (and harmlessly) through the void. You have a differing opinion (knowing that severing the anchors would be suicide) and wish to use the Star Galley to further adventure into Battlespire. Take the five Cogs you found (points F, I, N, C, and Q), and insert them into their positions in the control in the center of the room at P. Once this is done, the door to the Star Galley Crib opens to the east. Talking further with Clarentavious, mention the Typos Sophia, and he will confirm that he indeed has the item, a magical staff. However, he scoffs at any request for the item, as he fears losing it will allow Lord Methats to possess his mind. Present proof of the Dremora's demise (his pauldron, complete with badge) and Clarentavious will be impressed enough to give you the Typos Sophia without further question.
Point R - Star Galley Hangar[edit]
Here you find a simple ship named the Star Galley. Entering this ship will take you on towards Level 2a, and your ultimate fate. The five Anchors are visible behind the Star Galley, shining blue for any that have been closed. If any are still missing the blue glow, you need to return to the anchor control and close it. Looking at the Star Galley, from left to right, the anchors correspond to the controls at points Q, E, G, D, and O respectively.
Point S - Mock Turtle Room[edit]
Below the platform just before the Star Galley is a secret teleporter. Carefully drop down to reach it. This brings you to a large room where a huge creature resides—the Mock Turtle. Speak to him to hear his (long, boring) story and learn a password. This password is the answer to the riddle on the plaque on the northwest wall. It reads,
- Though straightway is rightway
- For most paths, I've found,
- Most goodway is sometimes
- The other wayround.
The answer is "eltrut kcom", which reveals a chest. The teleporter in the northwest corner returns you near the Star Galley.
Enemies[edit]
Notes[edit]
- If you uncouple all five Great Anchors, the game will end with a simple splash screen:
-
- "Nice work! You've unlocked all five of the anchors holding Battlespire in place. As Battlespire drifts from the mana streams, the forces binding it's [sic] architecture are loosened. This is a bad thing. You are sad, but only briefly."
Bugs[edit]
- Some terrain that looks solid can be jumped through or fallen from.
- Repeatedly clicking the chest revealed by the Mock Turtle's riddle may cause it to rise into the air.
Map[edit]
| Prev: None | Up: Quests | Next: Administration, Labs and Library, Part 1 |
